
Assembly & Baking
Now It All Comes Together
OK... we have a three day old dough waiting in the refrigerator. We have our sauce, cheese(s), and other toppings ready. So, let's start the magic and make a pie. How do we go about it?
| 3 Hours Before Baking | First, remove the dough from the refrigerator. Then, prepare a cookie sheet or other flat surface with a layer of semolina. We use a poly cutting sheet for this but, even a counter top will do. Next, carefully remove the cold dough from your dough bucket (try to keep it as round as possible). | 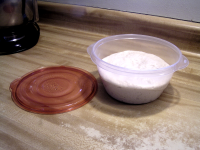 |
| Dough Warms & Rests | Carefully pat the bottom of the ball to remove surface bubbles. The dough "ball", by this point, is more of a dough disk with a definite top and bottom. So, place the dough disk top side up on the prepared surface (see Tip #1). Next, sprinkle the top of the disk with semolina and cover with plastic wrap. Allow dough to rest for 3 hours. During that time the dough will warm up and resume fermentation. | 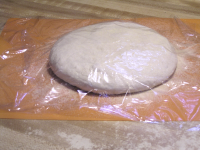 |
| Happy Hour | While the dough is resting and warming up you have time to participate in your favorite vice (whatever that may be). But, it's also the perfect time to prepare your cheese blend, pre-cook italian sausage, and chop the veggies for your toppings. We usually top with pepperoni, onions, green peppers, mushrooms, black olives, italian sausage, and our cheese blend du jour. |  |
| Form The Pie | At this point, the dough has rested and re-started it's ferment. It's time to wake it up and form the pie. Now, I grant you, this isn't the easiest thing to do. But, it doesn't have to be done by throwing it into the sky as a juggling act. No, there is a way to leave the dough safely on the counter and stretch it out. Watch this video by Diana Coutu. I use her excellent technique with only two variations. First, my pie ends up on a semolina coated pizza peel. And, second, the final air toss isn't necessary (just fun). So, unless I'm feeling feisty, I omit it. | 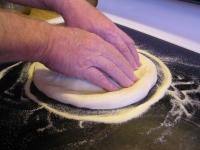 |
| Heat The Oven | Now that the dough is formed and resting safely on the peel, it's time start pre-heating the oven. Pizza is baked at the highest temperature you can achieve with your oven. Ours tops out at 550 degrees F. Note that I said bake, not broil. Also, don't forget to remove any extra oven shelves, you want unimpeded access to your pizza stone (see Equipment page). Ours takes 45 minutes to get up to temperature and the stone needs a little extra heating time. | 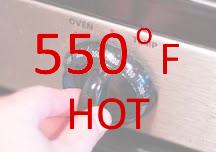 |
| Shake Shake Shake | Practice shaking the pie while the oven heats. It's best to get the hang of this before you add toppings. By shaking I mean picking up the peel and moving it briskly forward and back by about 1/2 to 1 inch per stroke. Your dough should slide ever so slightly during the shake. If it doesn't, you need to sneak more semolina between the dough and the peel. | 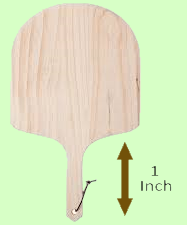 |
| Add Toppings | While giving the peel a little shake between each topping start building your pizza. Sauce goes down first (see Tip #3). Follow this with your toppings of choice and finish with the cheese blend. | 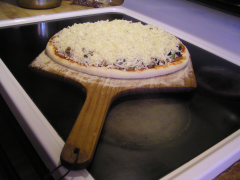 |
| From Peel To Stone | This step requires a little skill but, really isn't that hard. It just takes practice. So, if this is your first time, don't panic. Here's how it's done. First, do the little "shake shake shake" thing to get the dough loose on the peel. Second, open the oven door. Third, extend the peel to back of the oven with the tip of the peel on the stone. Next, lift the peel handle so the peel is angled down toward the stone. Now, give the peel a quick, slightly harder shake to start the pie sliding off the peel. Then, continue with the little shakes and slowly withdraw the peel leaving the pie on the stone. Finally, close the oven (see Tip #4). |  |
| The Bake | The bake is almost an anticlimax to the whole process. It only bakes for 8-10 minutes and it's done. Wonderful, let's eat. But, before I close this section I have another bit of advice. I only bake based on time when I'm testing a new cheese blend. Each cheese blend melts and starts to brown at its own rate. If I'm familiar with the cheese blend, I base the bake time solely on the appearance of the cheese. If you bake a few pies you will see what I mean. | 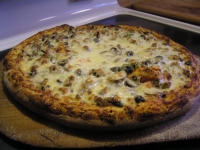 |